
You have decided to take your crypto off the exchange and into your own hands — the single smartest security move most holders ever make. Now you are staring at a small device that looks like a USB stick, a 24-word recovery phrase, and a mild sense of terror that one wrong step could vaporise your savings. Take a breath. Setting up a hardware wallet as a complete beginner in 2026 is genuinely straightforward — manufacturers have spent years sanding down the rough edges — provided you follow the right sequence and avoid the handful of classic mistakes. This is that sequence, explained with zero assumed knowledge.
What a Hardware Wallet Actually Does
A hardware wallet is a small physical device that stores your crypto’s private keys — the secret codes that prove ownership and authorise spending — in a sealed chip that never exposes them to the internet. When you want to send crypto, the device signs the transaction internally and only the signed approval (never the key itself) touches your computer. Even if your laptop is riddled with malware, the keys remain safe inside the device.
The crucial mental model: the device is replaceable; the recovery phrase is everything. Your crypto does not live “in” the wallet — it lives on the blockchain. The 24-word recovery phrase is the master key to it. Lose the device but keep the phrase, and you restore everything on a new device. Lose the phrase, and no device, company or government can help you.
Step 1: Buy Right (This Matters More Than You Think)
Buy only from the manufacturer or an authorised reseller — never second-hand, never from a marketplace seller, no matter how good the deal. Tampered devices are a real attack vector: a compromised wallet can generate predictable phrases the seller retains. A genuine device arrives sealed; if the seal is broken or the device asks you to use a pre-printed recovery phrase, stop — a legitimate wallet always generates the phrase fresh on the device itself during your setup.
Budget £60–£150 for a reputable device. That is a one-time cost protecting potentially far larger sums — proportionate the moment your holdings exceed a few hundred pounds.
Step 2: Set Up in a Safe Environment
Do the setup at home, on your own trusted computer, on your own network — not on café Wi-Fi, not on a work laptop. The same caution that applies to using public Wi-Fi safely applies doubly when initialising the keys to your savings. Download the manufacturer’s companion app only from the official site (type the address yourself), and let the device generate its recovery phrase — never accept a pre-made one, and never let anyone “help” by generating it for you.
Step 3: Write Down the Recovery Phrase — Properly
This is the step where beginners most often fail, so give it the gravity it deserves:
- Write it on paper with pen, clearly, in order, checking each word twice. The words come from a fixed list — verify spelling against the device screen.
- Never photograph it. A photo syncs to cloud backups, gets indexed, and becomes hackable. Paper cannot be hacked remotely.
- Never type it into any website, app or document. No legitimate process ever asks for your full phrase except restoring onto a new genuine device you bought yourself.
- Make two copies and store them in separate secure locations — a home safe and, say, a sealed envelope with a trusted family member. Fire and flood are real risks; consider a metal backup plate for larger holdings.
- Do not get creative. Splitting words across locations, encoding them in riddles, or “hiding” them in books has locked more people out of their crypto than thieves ever have. Simple, boring, redundant storage wins.
The backup principle here mirrors good digital hygiene generally — just as backing up photos safely requires thinking about redundancy and access, your recovery phrase needs the same deliberate care, with higher stakes.
Step 4: Set a Strong PIN and Verify Everything
Choose a PIN you will remember but nobody could guess — not your birthday, not 1234. Most devices wipe themselves after a number of wrong PIN attempts, which protects against physical theft. Then verify: send a tiny test amount to the wallet, confirm it arrives, then send a tiny amount back out. This proves the whole loop works before you trust it with real money. Only then move your main holdings across — and consider moving in stages rather than all at once.
Step 5: Establish Your Ongoing Routine
Day-to-day, the routine is simple: keep the device’s firmware updated (updates patch vulnerabilities — install them from the official app only), keep the device itself somewhere safe but accessible, and periodically verify your recovery phrase copies are intact and legible. When receiving crypto, always verify the full receiving address on the device’s own screen — malware can alter addresses shown on your computer, but not on the device display. That one habit defeats an entire category of theft.
Mistakes That Destroy Beginners (Avoid All of These)
Buying a used device. Covered above — never.
Storing the phrase digitally. Cloud notes, email drafts, password managers, photos — all turn an offline secret into an online target.
Sharing the phrase with “support”. No support agent from any company will ever need it. Anyone asking is a scammer, including polished ones on video calls.
Skipping the test transaction. Moving your entire stack to an unverified setup is how people discover — too late — that they copied an address wrong.
Forgetting the PIN with no phrase backup. The device wipes after failed attempts; without the phrase, that wipe is permanent.
What About Inheritance?
Uncomfortable but essential: if something happened to you, could your family access your crypto? A recovery phrase in a safe nobody knows about is as lost as no phrase at all. UK holders should include crypto in their estate planning — a sealed letter with a solicitor, or clear instructions to a trusted person explaining what the phrase is and how to use it (without exposing it prematurely). The FCA’s consumer guidance and HMRC’s cryptoassets guidance both underscore that crypto is property with real-world implications — including for inheritance tax. Plan for it now, while it is easy.
Conclusion
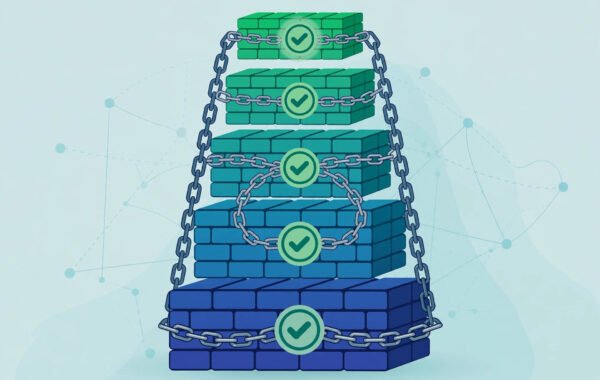
Storing crypto safely in a hardware wallet as a beginner comes down to five steps: buy genuine, set up on trusted equipment, guard the recovery phrase like it is cash (because it is), verify with test transactions, and maintain the routine. None of it is technically difficult — the difficulty is entirely in taking it seriously. Do it once, do it properly, and you will have achieved something most crypto holders never do: true ownership, secured against everything except your own carelessness. And that last part is entirely within your control.
Frequently Asked Questions
How much does a hardware wallet cost in the UK?
Reputable devices cost £60–£150 as a one-time purchase. Avoid cheap no-name devices and never buy second-hand — the savings are not worth the tampering risk.
What happens if my hardware wallet breaks or is lost?
Nothing, if you have your recovery phrase: buy a new genuine device, enter the 24 words, and everything is restored. Without the phrase, the crypto is permanently unrecoverable.
Can a hardware wallet be hacked?
The keys never leave the device, so remote hacking is effectively impossible. Realistic threats are physical theft combined with PIN guessing (mitigated by wipe-after-failures), supply-chain tampering (mitigated by buying direct), and social engineering to obtain your phrase (mitigated by never sharing it).
Should I keep all my crypto on a hardware wallet?
Most experienced holders keep long-term savings in cold storage and smaller active amounts in a hot wallet or on an exchange for convenience. Match the storage to how you use the funds.
Do I need to pay tax when moving crypto to a hardware wallet?
No — moving crypto between wallets you own is not a disposal for UK Capital Gains Tax. Tax applies when you sell, swap or spend. Keep records of transfers anyway; see HMRC’s guidance.