
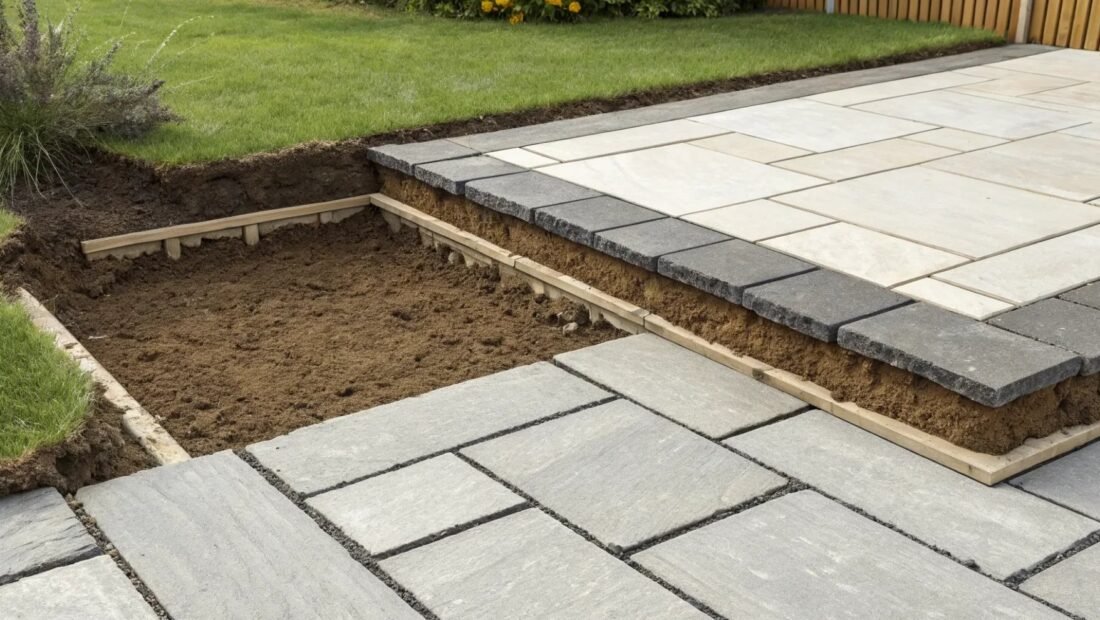
You want a patio, but the thought of excavating 15cm of garden, ordering tonnes of hardcore and hiring a wacker plate is… a lot. Laying slabs directly on grass is the quick-and-dirty alternative everyone asks about: is it actually viable, or a shortcut to a wobbly, weed-infested mess? The honest answer: it works fine for light-use paths and small seating areas, provided you do it right. Here’s how.
How to lay patio slabs on grass
When this method works (and when it doesn’t)
Works for: stepping-stone paths, small seating areas for a bistro set, temporary patios, shed bases for light sheds. Doesn’t work for: driveways, hot tubs, heavy garden furniture, or anywhere needing a perfectly level, permanent surface. If you want a proper entertaining patio, do the full excavation job — our landscaping cost guide covers professional patio pricing.
The method: step by step
- Mark out the area with string lines or spray paint. Lay the slabs dry first to check the layout and spacing — much easier to adjust now.
- Cut the turf: for each slab position, cut out the turf to the slab’s footprint plus 2–3cm, about 5–7cm deep. A half-moon edger or sharp spade works. Remove the turf (stack it upside-down somewhere — it composts into decent soil).
- Level the soil: firm down the exposed soil with your feet or a hand tamper. Check level with a spirit level — this is the step that determines whether your patio wobbles.
- Add a bedding layer: 2–3cm of sharp sand or fine gravel, screeded level. This is what the slab actually sits on — it allows fine levelling and drainage.
- Lay the slab: set it on the bedding, tap down with a rubber mallet, check level in both directions. Adjust by adding or removing bedding, not by forcing the slab.
- Leave gaps: 1–2cm joints between slabs. Brush in kiln-dried sand or leave grass to grow through for a natural look (mow over it — it works surprisingly well).
- Edge it: for larger areas, haunch the outer slabs with a bit of concrete or use edging stones — otherwise the edge slabs migrate over time.
Materials and costs
- Slabs: budget concrete slabs £3–£8 each (450mm); nicer riven or stone-effect £8–£20 each. A 3x3m area needs ~36–49 slabs depending on size.
- Sharp sand: £3–£5 per bag; ~4–6 bags for a small patio.
- Tools: spade, rubber mallet (£8), spirit level, string line. Total under £30 if you don’t own them.
- Total for a 3x3m patio: £150–£400 DIY, depending on slab choice.
Making it last
- Weed membrane: laying permeable membrane under the bedding layer suppresses weeds pushing through joints. Worth the £15.
- Drainage: give the patio a slight fall (1:60) away from the house — standing water breeds algae and frost damage.
- Don’t skip the bedding: slabs laid directly on soil (no sand) rock within months. The sand layer is the whole trick.
- Expect some movement: this method won’t match a properly excavated patio for longevity. Budget to re-level a slab or two every couple of years — a 10-minute job.
- Finish the edges: grass creeping over slab edges looks scruffy fast; a crisp edge (spade-cut or edging strip) keeps it sharp.
When to upgrade to the proper job
If the area gets heavy use, if slabs keep rocking despite your best efforts, or if you want it to look genuinely professional, the full method — 15cm excavation, 10cm compacted hardcore, 5cm mortar bed — is the answer. It’s a weekend’s hard graft or a £2,500–£5,000 professional job for 20m². There’s no shame in starting with the grass method and upgrading later; many people do exactly that.
While you’re improving the garden, consider the other quick wins: a freshly painted fence transforms the backdrop — see our fence paint guide — and a well-chosen shed gives the new patio something to look at.
Patio drainage: the unglamorous essential
Water is what kills patios — undermining bedding, breeding algae, and in winter, freezing and lifting slabs. The drainage rules:
- Fall away from the house: 1:60 minimum (about 17mm per metre). Towards the house means water against the damp-proof course — the most expensive patio mistake there is.
- Don’t block air bricks: the patio surface must sit at least 150mm below the damp-proof course (two brick courses). Paving up to the DPC bridges it and invites damp inside.
- Permeable joints: sand or grit joints let water through; mortar joints shed it. On the grass-laid method, permeable is fine and easier.
- Algae control: north-facing or shaded patios go green. A stiff brush and patio cleaner each spring prevents the slippery slide; a pressure washer is faster but can damage soft stone and blast out jointing sand.
- Winter: don’t use rock salt on concrete slabs — it damages the surface. Sharp sand gives grip without the harm.
Weed-free joints: realistic expectations
Weeds in patio joints are inevitable; weed-free is a maintenance state, not a permanent one. What works:
- Brush-in polymeric sand (£15–£25 per bag) instead of plain kiln-dried sand — it sets firm and resists weed germination far better. Worth it on any patio you’re putting effort into.
- Weed membrane beneath stops deep-rooted weeds but not surface seeds — manage expectations.
- Regular brushing: a stiff broom every few weeks dislodges seedlings before they establish. The lowest-tech, most effective weed control there is.
- Spot treatment: boiling water or a dedicated path weedkiller for established weeds. Never use lawn weedkiller near the grass edge — it’ll kill the lawn too.
For the wider garden picture — planting, lawns and all — the RHS gardening advice is the UK’s most reliable free resource.
Sealing patio slabs: worth it?
Patio sealants promise stain resistance, colour enhancement and weed suppression — at £30–£60 for 5 litres covering ~20m². The honest assessment: worth it on porous stone (sandstone, limestone — which stain badly from food, drink and leaf tannins), marginal on dense concrete slabs (which are already fairly resistant). Seal only clean, dry, established paving (never new slabs — wait 3–6 months for them to weather and release manufacturing salts, or the sealer traps efflorescence underneath). Apply with a roller on a dry day above 10°C, two thin coats. It lasts 3–5 years before needing reapplication. It won’t make a patio maintenance-free — nothing does — but on the right stone it keeps the colour true and the red wine stains liftable.
The takeaway
Cut turf, level soil, sand bedding, lay slabs, brush joints. £150–£400 and a weekend for a small patio that’ll serve well for light use. It’s not a substitute for a proper excavated patio — but for paths, bistro sets and budget garden makeovers, it’s a perfectly respectable shortcut.


